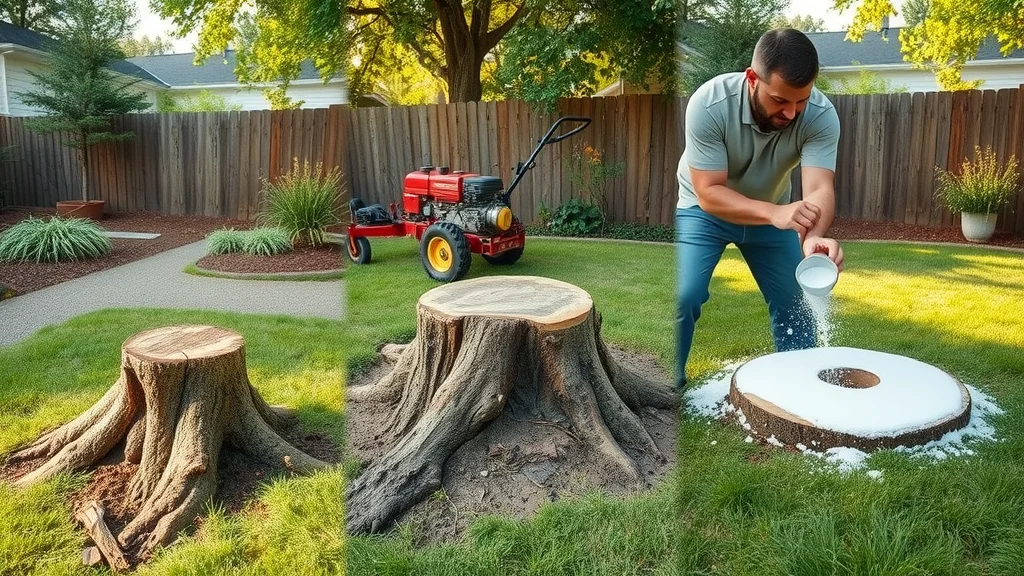





Tree Guardian News
Tree Guardian News
  • Home
  • Categories
    • Storm Damage & Prevention
    • Tree Care Tips & Landscaping
    • Tree Disease Identification & Treatment
    • Insurance Intel
    • DIY Tree Care & Safety
    • Sustainable Tree Care & Eco Solutions
    • Professional Tree Services
    • Arborist Stories
    • Latest News
    • Industry Insights
Join the Arborist Forum 
November 10.2025
1 Minute Read

DIY Stump Removal Tricks for Quick Success

Ever stared at a stubborn tree stump in your yard and wondered, “Is there a fast, safe, and simple way to get rid of this eyesore myself?” DIY stump removal isn’t just possible—it’s practical, efficient, and can transform your outdoor space. In this comprehensive guide, we’ll unpack expert tools, insider tricks, and little-known methods to remove a tree stump with results you’ll love. Whether you want a lush lawn or simply peace of mind, these techniques put success at your fingertips. Ready to reclaim your yard? Let’s dig in!

Curious About DIY Stump Removal? Discover the Truth Behind Quick and Effective Techniques

If you’re seeking diy stump removal tricks that actually work, you’re not alone. Tree stumps are more than inconvenient—they can be tripping hazards, attract pests, and derail your landscaping plans. Thankfully, you don’t need costly tree removal companies or complicated equipment to tackle the job. This article reveals how to remove a tree stump quickly and safely, whether you choose hands-on effort, a stump grinder, or eco-friendly solutions like epsom salt and potassium nitrate. You’ll gain vital insights on how to match methods to stump size, understand time and cost trade-offs, and operate safely for best results.

With smart planning and the right tools, even large stumps become manageable. We’ll walk you step by step through every approach, showcase what to expect from mechanical vs. all-natural options, and arm you with safety tips and post-removal cleanup pointers. It’s time to debunk myths and share proven strategies you can apply today—because in the world of stump removal, knowledge is power and time is money.

What You'll Learn About DIY Stump Removal

  • How to choose the best diy stump removal method
  • Insider tricks for removing a tree stump quickly
  • Comparison of natural versus mechanical stump removal
  • Expert guidance on safety and environmental impact
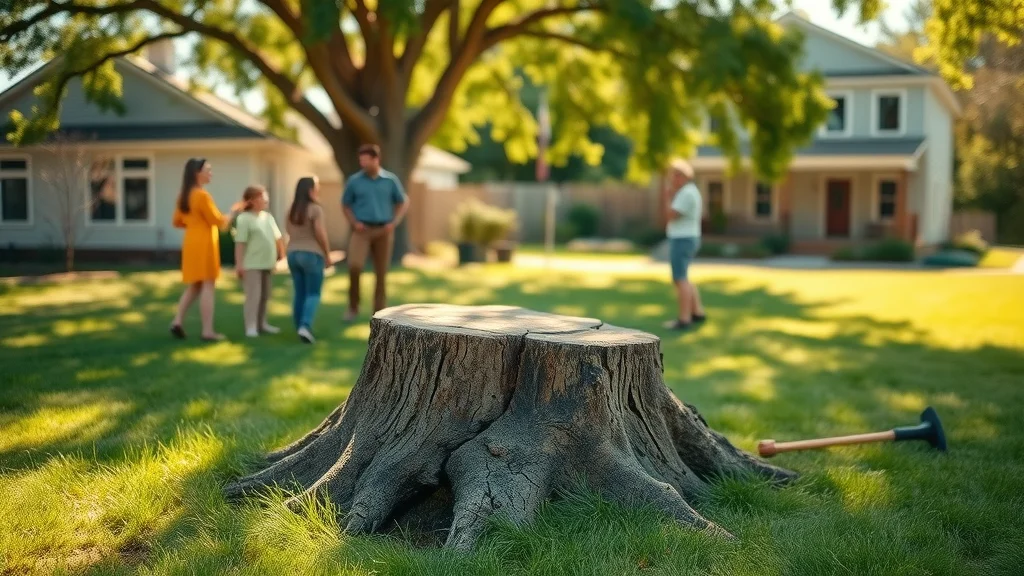
diy stump removal in a residential backyard - families discuss tree stump, lush greens and sunlit textures

Why Remove a Tree Stump? Hidden Hazards and Benefits

Keeping a tree stump in your yard might seem harmless, but the consequences go deeper than appearance. Tree stumps can become unexpected tripping hazards, especially on busy lawns or areas where children play. They often serve as breeding grounds for pests like termites and carpenter ants, potentially threatening nearby trees or even your home’s foundation if the stump remains unchecked. Ignoring a stump can also create an unsightly focal point, undermining curb appeal and reducing your property’s value over time.

Aside from safety risks, leftover tree stumps can impede lawn maintenance. Running over a stump with a lawnmower can damage equipment and leave ragged patches of dead grass. If you’re planning enhancements, such as installing a patio, garden bed, or electric fence, the stump becomes an obstacle requiring removal. Understanding these hidden hazards highlights why stump removal is often more than a cosmetic concern—it’s a smart step in home improvement and effective landscape management.

Tree Stump and Tripping Hazard Risks in Your Yard

Leaving a tree stump in your yard introduces a persistent tripping hazard. This risk is especially pronounced around walkways, playgrounds, or active family areas. During the day, grass may grow up around the stump, camouflaging it and increasing the likelihood of an accident. At night or in low-light conditions, the hazard becomes even more pronounced. The consequences? Skinned knees, twisted ankles, or worse injuries, all from a stump that could have easily been removed. Beyond physical risk, stumps provide shelter for wildlife and insects that can disrupt a healthy lawn, and moisture around the stump may contribute to fungal growth, further increasing safety risks for children and pets. Mitigating tripping hazards is a top priority for families seeking a safe, accessible outdoor space.

Neighborhoods where outdoor activity on this service is common, such as playing catch or maintaining a charcoal grill, can see stumps increase insurance liability and hazard potential. Removing a tree stump isn’t just a visual improvement—it’s a practical way to avoid personal injury and costly claims. Prioritize removing old stumps to ensure both beauty and safety in your landscape.
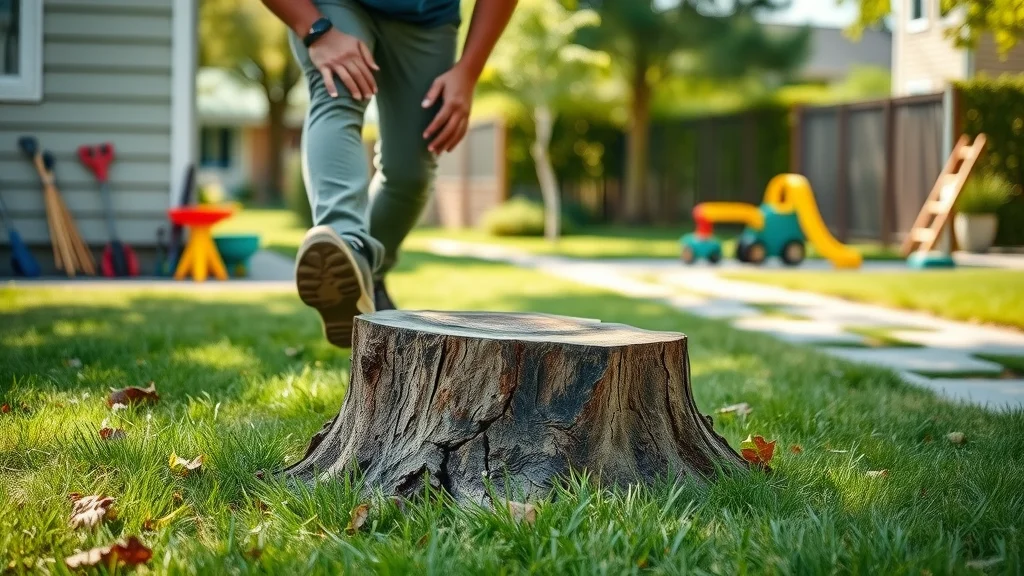
tree stump posing as tripping hazard in modern suburban lawn

Benefits of Stump Removal for Lawn Health and Curb Appeal

The benefits of tree stump removal stretch far beyond hazard reduction. A cleared yard enhances curb appeal instantly, making your property more inviting and marketable. Your lawn becomes safer for children, pets, and guests, while mowing and maintaining the grass are much easier. Additionally, removing the stump helps prevent the regrowth of unwanted shoots, maintaining a uniform lawn that’s easier to landscape or upgrade with features like a garden, play area, or electric fence.

Without a stump, you can even out your yard, reseed grass, or lay sod—restoring the area to its natural beauty. This process eliminates pest habitats and helps halt the slow decay that might otherwise attract fungi or wood-boring insects. If you’re considering selling your home or simply want peace of mind and a healthier outdoor environment, stump removal is a clear win. Whether you choose to remove a tree stump yourself or hire a tree service, this upgrade pays off in both short-term enjoyment and long-term property value.

"Neglecting a tree stump isn’t just an eyesore—it’s a tripping hazard and an invitation for pests. DIY stump removal saves frustration and transforms your yard."

Top DIY Stump Removal Methods: Stump Grinders, Natural Solutions, and More

There are several effective DIY stump removal methods to choose from, each with its unique strengths. Selecting the right option depends on your stump size, timeline, and resources. Manual methods like digging work best for small stumps, while treatments like epsom salt and potassium nitrate dissolve medium and large stumps over time. For fast results on big stumps, nothing beats a mechanical stump grinder. Let’s break down each approach—so you can match your project with the perfect solution and avoid a tree removal headache.

The method you choose also impacts your labor, the tools required, and the environmental footprint of your stump removal. If you’re torn between renting a stump grinder or harnessing nature’s chemistry, this section will point you in the right direction with honest, actionable comparisons.

For those looking to optimize their yard maintenance beyond stump removal, integrating seasonal tree care can make a significant difference. Discover practical strategies in these fall tree trimming tips that most homeowners overlook to keep your landscape healthy and hazard-free year-round.

How to Remove a Tree Stump by Hand

  • Tools required for manual diy stump removal
  • Best for small tree stumps
  • Step-by-step removal process

Manual removal is an effective approach for small tree stumps and gives you complete control over the process. Start by gathering essential tools: a sturdy shovel, a digging bar, a mattock or pickaxe, and (for stubborn roots) an axe to chop through thick wood. Select a day with soft soil—ideally after rain. Begin by digging a trench around the stump to expose major roots. Use the digging bar and shovel to widen the trench, then swing the axe or use a hand saw to cut through roots as you encounter them. By rocking the stump gently and clearing outsoil, you can eventually pry it free. This method requires patience but offers clear results, especially if you need to avoid a tree service bill or want to control disposal of chips and debris.

The manual approach is best when the stump’s diameter is less than 12 inches and is not located near obstructions like a fence or utility lines. While labor-intensive, it’s a low-cost way to remove a tree stump and grants a sense of accomplishment and peace of mind knowing the job is thoroughly done.
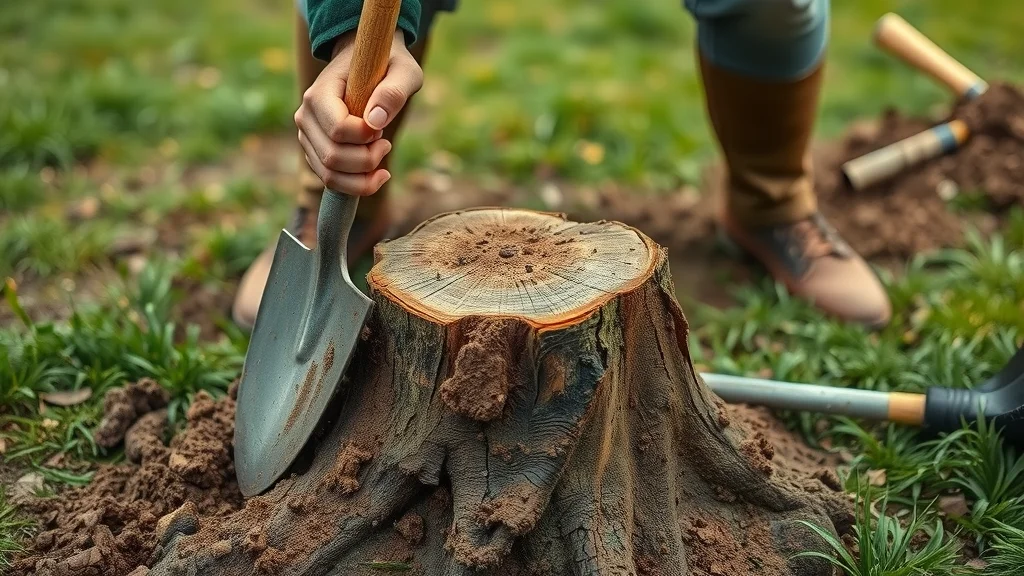
hands-on stump digging in progress using shovel and mattock

Using a Stump Grinder for DIY Stump Removal

  • Choosing the right stump grinder
  • Safety tips and personal protective equipment
  • Efficient operation for large stumps

For medium to large stumps, a stump grinder offers unmatched efficacy and speed. Renting a stump grinder from a local hardware store is usually more economical than buying, unless you anticipate frequent use. When selecting a grinder, ensure the cutting wheel is suited to your stump’s size and your yard’s terrain. Safety is paramount—always wear the recommended PPE: gloves, goggles, sturdy boots, and ear protection. Before operation, clear the area of rocks, toys, or debris to avoid injuries or damage to the blade. Read the manufacturer’s instructions thoroughly and check local fire restrictions if grinding generates sparks.

Position the grinder over the stump and slowly lower the cutting wheel, moving it back and forth to grind the wood to below ground level. Continue until the stump is fully reduced to mulch, about 8-10 inches below the surface. This method quickly handles big jobs, with most grinders capable of tackling large tree stumps in under two hours. Grinding is fast but generates a lot of chips and dust—plan for cleanup and proper disposal. Despite the higher initial effort, this approach combines efficiency with satisfying results, turning a massive stump into usable mulch while avoiding the cost of a professional tree stump removal service.
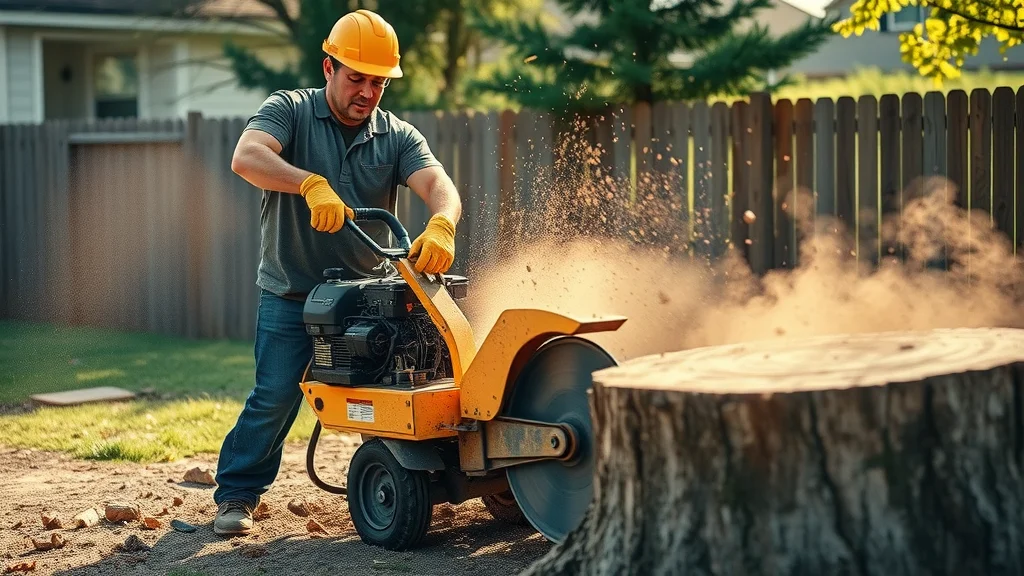
stump grinder in action for diy stump removal

Natural Solutions: Remove a Tree Stump with Epsom Salt or Potassium Nitrate

  • Scientific principles behind Epsom salt and potassium nitrate
  • Step-by-step guide to chemically rotting a tree stump quickly

If physical labor or heavy equipment isn’t an option, consider natural chemical methods to remove a tree stump. Common products include epsom salt (magnesium sulfate) and potassium nitrate, both of which speed up stump decomposition. Begin by drilling deep holes (8–10 inches) into the top and sides of the stump. (Tip: The more holes you drill, the faster decomposition occurs—use a wide drill bit for best results.) Fill the holes with your chosen chemical—a full cup per hole for optimal effect. Cover the stump with a tarp to retain moisture, then wait several weeks.

These natural solutions work by drawing moisture out and disrupting cellular processes, effectively starving the wood. Potassium nitrate, commonly sold as a commercial stump remover, can reduce a large stump to soft, crumbly wood in 4–8 weeks. Epsom salt is slower but safer for surrounding soil and easier to source. Both methods minimize environmental impact and are excellent when you need a low-labor, gradual approach—just set your expectations, as even the fastest results take a few weeks. For added speed, cover the stump and keep it moist, turning your patience into success over time.

Table: DIY Stump Removal Methods Compared

Method Best For Time to Remove Tools Needed
Hand Digging Small tree stumps 2–6 hours Shovel, axe
Stump Grinder Large stumps 1–2 hours Stump grinder, PPE
Epsom Salt Moderate size 8–12 weeks Drill, Epsom salt
Potassium Nitrate Large tree stumps 4–8 weeks Drill, potassium nitrate

comparison of diy stump removal methods (manual, grinder, chemical)

Step-by-Step: How to Remove a Tree Stump Safely

Removing a stump safely requires preparation and methodical execution. Whether you choose manual, mechanical, or natural methods, always begin by surveying for underground utilities and clearing the work area. Wear gloves and eye protection for every approach, and keep children and pets away from the site until the job is complete. For larger stumps, assess the soil and stump stability, especially if you need to avoid a tree shift that could endanger nearby structures or fences. Organize your tools before starting, and plan for breaks in physical tasks to prevent overexertion. Prioritize safe tool handling and appropriate storage during and after use for peace of mind.

Once the stump is removed, backfill the hole with soil and debris, level the area, and reseed or replant grass to encourage swift recovery. Many DIYers cover the spot with mulch or sod for an instant facelift. These clean-up steps help restore your landscape while eliminating tripping hazards or pest-attracting debris that may remain after removal. Regardless of the method you select, following safety best practices ensures your project ends successfully and injury-free.

Preparation for Stump Removal

A successful diy stump removal starts with careful planning. Walk around your yard to identify any obstacles, such as rocks, pipes, or power lines—contact utility services if you’re unsure. Gather all required tools, including shovels, mattocks, saws, and personal protective equipment (PPE). For chemical methods, source high-quality epsom salt or potassium nitrate, and check product labels for safety information. Schedule your removal project on a day with favorable weather for comfort and visibility. If you’re using a grinder, reserve rental equipment in advance and ensure you have a safe path for delivery and movement.

Remove decorative items, hoses, or electric fence components near your work zone to avoid damage. Place necessary items within easy reach but away from active digging or grinding for safety. With good preparation, you’ll make steady, efficient progress and set the stage for a hazard-free project.

Protecting Yourself and Your Yard

Safety during stump removal is non-negotiable. Always wear gloves to protect your hands from blisters, sharp roots, or splinters. Sturdy boots shield feet from heavy tools and prevent slips, while long sleeves and safety goggles minimize risk from flying debris and wood chips. If you’re operating a stump grinder, mandatory PPE includes ear protection, a face shield, and snug-fitting clothing to avoid accidents. Mark boundaries around your removal area using cones or rope—this keeps children, pets, and bystanders at a safe distance during the process.

If using chemical methods, prevent children and pets from accessing the treated stump. Place a visible marker or cover the site with a tarp, and always store chemicals in a secure location away from heat or sparks. Even when relying solely on hand tools, keep a first aid kit and phone handy in case of minor injuries or emergencies. Prioritizing protective steps is essential for achieving peace of mind and smooth, incident-free completion of your diy stump removal project.

Final Cleanup After DIY Stump Removal

With the stump gone, it’s cleanup time! Start by removing coarse wood chips, root fragments, and any leftover chemical containers. Use a rake to smooth the soil and fill in low spots; compost or dispose of organic debris according to local guidelines. If large holes remain after removing a tree stump, backfill with topsoil and tamp it down to promote healthy regrowth. For a professional finish, reseed the affected area or lay down fresh sod—this step restores appearance and prevents weeds.

Double-check for lingering hazards, such as exposed roots or tool fragments, and store all equipment securely for future use. If you’ve reused chips as mulch, spread them evenly to aid moisture retention elsewhere in your garden. Post-removal cleanup delivers that final touch: a safe, attractive, and renewed yard where you can relax, entertain, or simply enjoy the fruits of your successful project. Congratulations—you’ve mastered every aspect of diy stump removal.
stump-free area and debris cleanup after diy stump removal

Cost and Time: Evaluating the Best DIY Stump Removal Approach

Choosing how to remove a tree stump is often about balancing time, money, and effort. Manual methods cost very little (mostly sweat equity), but require several hours of labor. Renting a stump grinder starts at around $100–$150 per day, which makes sense for large stumps or multiple removals. Chemical options have a low up-front cost ($10–$30), but take weeks to see effects—perfect if you’re not in a rush. Don’t forget to factor in costs for PPE and replacement hand tools. While it’s tempting to choose the cheapest solution, “time is money”; sometimes paying a little more for speed pays off, especially if you want to enjoy your refreshed yard sooner.

Compare each method closely: manual for small stumps, mechanical for urgency or extensive tree stump removal, and chemical for low-hassle, long-term results. No approach is universally “best”—align your choice with your needs, timeline, and willingness to work, and you’ll get satisfying results without busting your budget.

Cost Comparison: Manual, Chemical, and Stump Grinder

Manual digging is the most affordable route, costing nothing if you already own common yard tools. Renting a stump grinder for a day averages $100–$200 (plus delivery if needed), but the time savings can be substantial for large stumps. Chemical options, such as epsom salt or potassium nitrate, run $10–$35 for enough product to treat one sizable stump—making them a favorite for patient DIYers. Don’t forget PPE costs (gloves, goggles, boots) and tool wear, which can add $20–$50 if starting from scratch. When you add it up, the most cost-effective method may be a blend: dig by hand for small jobs, use natural decomposition for medium stumps, and rent a grinder if you have multiple or especially tough stumps in your yard.

If you’re overwhelmed or short on time, hiring a tree service averages $75–$350 per stump, with prices climbing for hard-to-access or very large projects. Even so, many homeowners find DIY options provide better value and personal satisfaction, especially with proper planning and preparation.

Expected Timeframe for DIY Stump Removal

Time is a critical factor in the method you choose for diy stump removal. Hand digging takes 2–6 hours, varying with soil, root complexity, and stump diameter. A stump grinder can transform large tree stumps into chips within 1–2 hours, though setup and cleanup may add extra time. Epsom salt and potassium nitrate, while minimal effort, require patience: expect 4–12 weeks for full decomposition, with potassium nitrate acting a bit faster. To accelerate these processes, drill more holes and keep the stump moist under a tarp, but be realistic about natural limitations.

Ultimately, your timeframe depends on urgency, project scope, and your own energy level. Plan ahead if you want the job complete before a big event, or start chemical treatment in the off-season for lawn makeovers come spring. Flexibility ensures you don’t sacrifice safety or lawn quality in pursuit of speed.
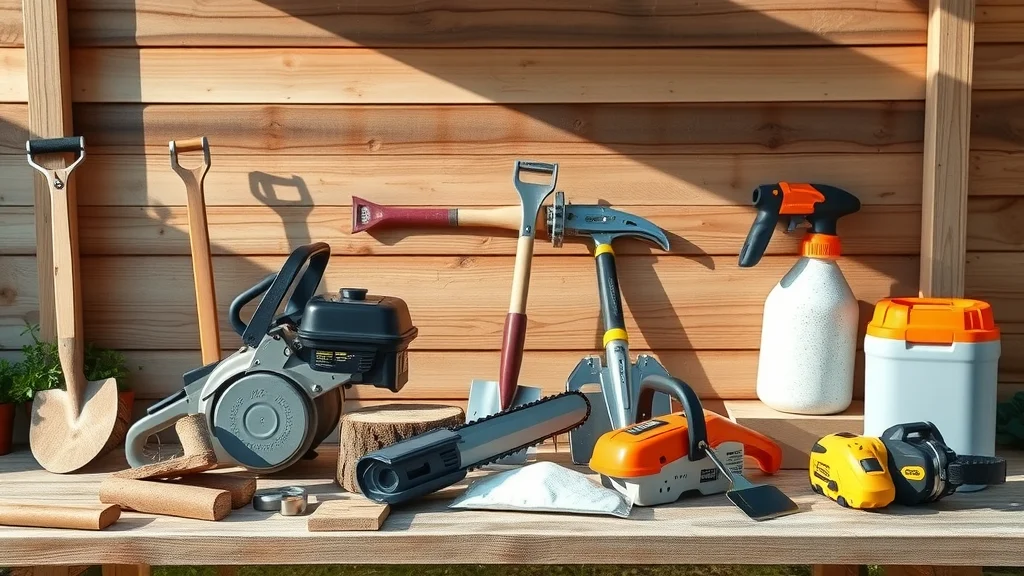
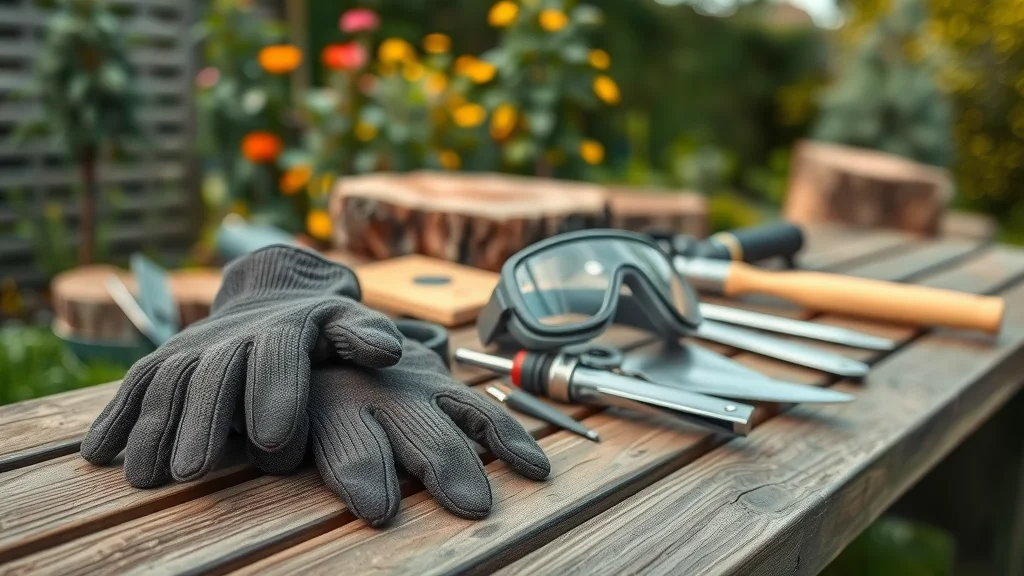
diy stump removal tools and safety gear organized on a workbench

People Also Ask: Expert Answers on DIY Stump Removal

What is the fastest way to get rid of a tree stump?

The fastest way to remove a tree stump is to use a stump grinder. Renting a stump grinder allows you to reduce most large stumps to mulch in just 1–2 hours. Before grinding, clear the area, wear full PPE, and follow machine instructions closely. Grinding is ideal for speed and efficiency compared to manual or chemical methods, which take much longer—making stump grinders the preferred solution when “time is money.”

How to get rid of a stump in 2-3 days naturally?

While most natural methods take weeks, the only way to see significant progress in 2–3 days is to combine several tactics: drill holes deeply into the stump, fill them with epsom salt or potassium nitrate, saturate with hot water, and cover with a tarp to lock in heat and moisture. Though this can accelerate internal decay, complete removal will still require additional time. For true removal within days, mechanical grinding remains the only truly quick method.

How long does it take Epsom salt to dissolve a tree stump?

Using epsom salt for diy stump removal takes about 8–12 weeks to fully decompose a standard-sized stump. The process depends on weather, stump size, and the frequency of chemical application. Drilling additional holes and keeping the area moist and covered will speed up results, but patience is necessary. Epsom salt is best for those who want a low-effort and environmentally gentle approach.

What will rot a tree stump quickly?

Potassium nitrate is the most effective and fastest rotting agent for tree stumps available to homeowners. Drill holes, fill with potassium nitrate, pour in hot water, and wait 4–8 weeks for substantial softening. Afterward, the stump can be broken apart with an axe or buried. Covering the area and keeping it damp ensures the process moves as quickly as possible.

Answers to People Also Ask

Speed and ease depend on the method you choose: stump grinders for fast removal, epsom salt for gradual decomposition, and potassium nitrate for the quickest chemical breakdown. Manual digging is labor-intensive but cost-free, while chemical options are safer for pets and children if properly contained and monitored. Prioritize safety and match technique to your timeline and yard environment for best DIY stump removal results.

DIY Stump Removal Video Tutorial: Watch Step-by-Step Methods

Watch our easy-to-follow explainer covering manual removal, chemical techniques, and safe use of a stump grinder—all demonstrated in a real backyard setting.

Essential Tools and Equipment for DIY Stump Removal

  • Stump grinder
  • Shovel
  • Mattock
  • Chainsaw
  • Hand saw
  • PPE (gloves, goggles, boots)

diy stump removal equipment essentials - grinder, shovel, ppe, chainsaw

Key Takeaways: DIY Stump Removal Success

  • Match removal method to stump size for best efficiency and safety
  • Prioritize PPE and careful planning before starting your project
  • Manual, mechanical, and chemical options suit different budgets and timelines
  • Effective cleanup and restoration ensure a beautiful, stump-free yard
  • Patience and preparation go hand-in-hand for lasting results

Frequently Asked Questions About DIY Stump Removal

Can I remove a tree stump without heavy equipment?

Yes. Small to medium tree stumps can be removed with hand tools such as shovels, mattocks, and axes. This approach is cost-free but requires time and effort. Chemical methods using epsom salt or potassium nitrate allow removal without machinery, but take longer to complete.

Are chemical methods safe for pets and children?

Chemical stump removers are generally safe when used as directed. Always prevent direct contact with treated stumps, keep pets and children away, and properly mark or cover the area during decomposition. After the process is complete, thoroughly remove and dispose of any remaining chemicals to return your yard to safe, regular use.

Conclusion: Take Control—Master DIY Stump Removal Today

With the right knowledge, tools, and safety tips, you can achieve fast and effective DIY stump removal and reclaim your outdoor space—no professional needed!

If you’re ready to elevate your landscaping skills even further, consider exploring broader tree care strategies that go hand-in-hand with stump removal. Our guide on fall tree trimming tips that most homeowners miss offers valuable insights for maintaining healthy, beautiful trees throughout the year. By combining smart stump removal with seasonal trimming, you’ll create a safer, more attractive yard and set the stage for long-term landscape success.

Ready to Tackle DIY Stump Removal? Grow your landscaping expertise—call 203-271-7991 or visit TreeGuardianNews.com to subscribe.

Tree Care Tips & Landscaping

112 Views

Write A Comment

*
*
Please complete the captcha to submit your comment.
Related Posts All Posts
07.10.2026

Transform Your Patio This Summer with These Shade Ideas

Update Why Smart Patio Shade Ideas Matter This Summer The joys of summer can quickly be overshadowed by scorching sun and uncomfortable temperatures, especially during peak hours. An exposed patio can turn into an unforgiving surface, reaching soaring temperatures that deter even the most enthusiastic outdoor lovers. But don’t fret—implementing the right patio shade ideas can dramatically change how you enjoy your backyard. With effective shading solutions, your patio transforms from a sun-baked surface to a lush outdoor room, perfect for summer gatherings, evening meals, or quiet reading sessions. Mix and Match: Your Ideal Patio Shade Combination To create the perfect summertime retreat, consider layering your shade options. One popular strategy involves combining a permanent structure, such as a pergola or pavilion, with flexible elements like shade sails or cantilever umbrellas. For example, a beautiful pergola not only establishes an architectural focal point but also serves as a base for climbing vines that provide living shade. Meanwhile, easy-to-move canopies can be deployed as the sun shifts, ensuring comfort throughout the day. Understanding the Common Mistakes to Avoid When diving into patio shading, remember some common pitfalls that many homeowners encounter. First, opting for a single large umbrella as your sole solution may lead to coverage gaps. Instead, layer your strategies to maximize shading. Secondly, choosing a structure that's too small for your patio can lead to frustration and reduced usability. Plan wisely! Measure how sun exposure shifts across your patio during key times to ensure total coverage. Top Patio Shade Ideas You’ll Love Here are some popular solutions to consider: A Pergola: Classic and elegant, a pergola provides partial shade while allowing dappled light to filter through. With options for climbing plants or retractable shades, it's a blend of function and beauty. A Pavilion: If you want full protection, a pavilion offers an ideal solution with a sturdy roof that deflects rain and sun alike, creating a perfect outdoor sanctuary. Louvered Roof System: If flexibility is key, look for adjustable louvered roof systems that let you control sunlight and shade with ease. Perfect for tech-savvy homeowners! A Cantilever Umbrella: For a temporary but effective solution, invest in a high-quality cantilever umbrella. They easily pivot to follow the sun, ensuring coverage wherever you dine. Shade Sails: These fabric panels are unique and trendy, perfect for covering odd-shaped patios. They disperse sunlight at various angles, enhancing aesthetics while keeping things cool. Consider Adding Natural Elements Don't forget the natural aspect of shade. Planting a specially chosen tree—like a Japanese maple or a river birch—on the south side of your patio creates gorgeous dappled shade as it matures. This addition not only cools your space but also enhances the visual appeal of your garden. How Outdoor Curtains Boost Comfort and Style Outdoor curtains are an often-overlooked element that can significantly impact how comfortable your patio feels. They add a dramatic shade element while providing a cozy atmosphere. When choosing fabrics, opt for UV-resistant materials that can withstand outdoor conditions and keep their vibrant colors year-round. Creating a Personal Oasis This summer, don't let the heat drive you indoors. With the right mix of structure and plants, you can create a shaded escape. Whether you opt for elegant pavilions, playful shade sails, or sophisticated curtain drapery, the key lies in combining elements that suit your space, lifestyle, and personal style. Immerse yourself in the outdoors while safeguarding against the elements. Trust us, those summer patio memories are just around the corner! Feeling inspired? Step outside and evaluate your patio space today to make the most of summer fun.

07.10.2026

Enhance Your New Jersey Yard with These Thriving Privacy Shrubs

Update Creating Privacy in Your New Jersey Backyard Whether you live in a bustling neighborhood or a quiet suburb, privacy is a valued aspect of any yard. In New Jersey, property owners often seek out effective solutions to create visual barriers that protect them from prying eyes. Enter privacy shrubs. Not only do these plants provide natural seclusion, but they also enhance the beauty and biodiversity of our green spaces. Why Choose Shrubs for Privacy? Shrubs are an excellent choice for privacy due to their dense foliage and varying heights, making them versatile enough for any landscaping needs. Unlike fences or lattice, which can be stark and artificial, shrubs provide a lush, living barrier that improves the aesthetic of your surroundings. They can soften hard lines, blend into natural landscapes, and even support local wildlife. Must-Have Shrubs for New Jersey Gardens When selecting shrubs for privacy, it’s essential to focus on species that thrive in New Jersey's climate. Here’s a carefully curated list of shrubs that not only promise to grow robustly in New Jersey but also provide the most value when it comes to privacy. 1. American Arborvitae (Thuja occidentalis) The American Arborvitae is a renowned privacy shrub known for its rapid growth and tall, narrow form. Perfect for creating a living hedge, this evergreen can reach heights of up to 30 feet, providing excellent year-round coverage. It’s resilient to pests and diseases, making it a low-maintenance choice. 2. Eastern Red Cedar (Juniperus virginiana) This versatile evergreen is native to New Jersey and boasts a beautiful bluish-green color. The Eastern Red Cedar grows up to 50 feet tall, creating an impressive privacy screen. Additionally, its fragrant wood is appealing to many gardeners. 3. Boxwood (Buxus spp.) If you prefer a more formal look, the Boxwood shrub is ideal. With dense, evergreen foliage, these shrubs can be easily trimmed into either natural or manicured shapes, making them perfect for creating defined boundaries around your backyard space. 4. Privacy Viburnum (Viburnum dentatum) This deciduous shrub offers beautiful blooms in spring and fall while providing thick foliage for privacy. It can reach heights of up to 10 feet and attracts birds, making it a fantastic selection for wildlife lovers. 5. Wax Myrtle (Myrica cerifera) A fast-growing evergreen that thrives in coastal areas, Wax Myrtle can also do well in inland New Jersey. Its fragrant leaves and unique bluish berries make it a favorite among gardeners seeking both privacy and aesthetic appeal. Creating a Well-Designed Privacy Area While selecting the right shrubs is crucial, how you design your privacy area enhances the overall effect. Consider mixing shrubs of different heights and colors for a more natural look, allowing for visual interest in your landscape. Avoid planting them in rigid lines; instead, create curves or clusters to mimic nature. Maintenance Tips for Your Privacy Shrubs To ensure your privacy shrubs remain healthy and thriving, regular maintenance is key. Here are some quick tips: Watering: Newly planted shrubs need consistent watering for the first few months. Trimming: Regular pruning helps maintain the shape and promote healthy growth. Pest Management: Keep an eye out for pests and apply organic treatments if necessary. Conclusion Choosing the right shrubs for privacy in your New Jersey yard can significantly enhance your outdoor experience. Not only do these plants provide seclusion, but they also support local fauna and add beauty to your landscape. As you consider your options, remember to take into account your property's specific conditions and your personal preferences to create the perfect garden retreat for yourself and your family.

07.10.2026

Unlock the Potential of Your Small Backyard: Transformative Landscaping Ideas

Update Transform Your Small Backyard with Smart Landscaping Ideas Having a small backyard can feel limiting, but with the right landscaping strategies, you can turn every square foot into a functional and beautiful space. Whether it’s creating a cozy seating area, a small vegetable garden, or a peaceful retreat, clever designs can make your yard the envy of the neighborhood. The good news is that small spaces can be just as enchanting as larger ones with the right approach and a few useful ideas. Make the Most of Vertical Space One simple way to enhance a small backyard is to utilize vertical space effectively. Installing trellises or vertical gardens allows you to grow plants upward, saving valuable ground space. Imagine climbing vines like clematis or hanging flower pots filled with vibrant petunias bringing color and life to your walls; these features not only beautify but can also provide shade and privacy. Additionally, incorporating wall planters on fences or walls can create green art that transforms your backyard into a living gallery. This technique maximizes space and brings nature closer to your home, enabling a peaceful retreat that invites quiet moments among beauty. Create Zones for Different Activities When space is at a premium, consider dividing your backyard into functional zones. You could create a small dining area with a table and chairs, a play zone for kids, and a gardening nook. This not only organizes your space but also offers varied experiences without making it feel crowded. Moreover, using rugs and furniture arrangement can visually separate these areas, creating an illusion of larger space. Adding multifunctional furniture, such as a bench with storage, can enhance your space's usability. Look for tables that can expand for gatherings or fold away when not in use. These smart choices ensure that every square inch serves a purpose, making the most of your small outdoor area. Choose the Right Plants For limited space, selecting the right plants is crucial. Opt for native species that require less maintenance and are well-suited to your local climate. Plants such as lavender or ornamental grasses can thrive in small areas while adding texture and fragrance to your garden. Also, consider plants that perform double duty, like edible flowers or herbs, which are both beautiful and functional. Furthermore, incorporate container gardening into your design. Containers offer flexibility and can be moved around as needed, providing opportunities to mix and match plants throughout the seasons. This versatility allows for creativity and easy care, making your garden adaptable and ever-changing. Incorporate Hardscaping Features Hardscaping, which includes paths, patios, and decks, can greatly enhance a small backyard. A well-placed stone pathway can guide visitors through your garden while creating the illusion of expanded space. Moreover, using deck tiles or pavers can create inviting outdoor seating areas that blend seamlessly with nature. Adding a fire pit can also serve as a cozy gathering spot during cooler evenings, expanding your usable space year-round. With the right hardscaping elements, your small backyard can become an all-season sanctuary that invites relaxation and connection with family and friends. Use Color and Texture to Unify the Design Color plays an essential role in creating a cohesive look. By selecting a color palette for your furniture, plants, and decor, you can unify all elements of your backyard. Soft hues can create a calm and relaxing vibe, while bold colors can energize the space. Mixing different textures—from rough tree bark to smooth stone paths—adds visual interest without needing more space. Consider adding cushions, outdoor rugs, and decorative pots to further enhance the sensory experience. Maintaining Your Small Landscape Smaller gardens require just as much love and care as larger yards. Regularly pruning plants, clearing debris, and ensuring soil health can keep your garden thriving. Remember, a well-maintained garden appears more spacious and inviting, making each square foot feel truly utilized. Take the time to establish a simple maintenance routine, including watering, weeding, and fertilizing your plants. Keeping an eye out for pests and diseases will also help promote a vibrant and healthy landscape. Consider planting a few disease-resistant varieties to minimize maintenance and enhance your garden's resilience. Inspirational Quotes for Your Gardening Journey As you embark on your backyard transformation, keep encouragement at heart. Maya Angelou once said, "Nothing will work unless you do." This applies beautifully to gardening—every bit of effort put in will yield stunning results. Remember, your small backyard can become a place of joy, peace, and beauty with the right vision and care. Transforming your small backyard into a vibrant oasis is entirely achievable with a bit of creativity and the right strategies. Whether through vertical gardening, smart plant selection, or maintaining a tidy aesthetic, you’ll find that each square foot can deliver joy and functionality. So why not start your landscaping adventure today?

Green Space News

Homeowners & Businesses concerned about tree and landscape care, safety issues from storms, old or diseased trees, structural damage risks, and insurance implications.

Green Space News is a subsidiary of RP Design Web Services.

COMPANY

  • Privacy Policy
  • Terms of Use
  • Advertise
  • Contact Us
  • Menu 5
  • Menu 6

AVAILABLE FROM 8AM - 5PM

Cheshire,CT

POBox 1189

ABOUT US

Green Space News is your go-to media hub for cutting-edge strategies to maintain a safe and vibrant environment. We are committed to protecting your property and family by providing proactive tree hazard prevention and awareness. Our platform  empower communities to safeguard their surroundings and enjoy healthier, more resilient landscapes.

© 2026 RP Design Web Services All Rights Reserved. P.O. Box 1189, Cheshire, CT 06410 . Contact Us . Terms of Service . Privacy Policy

eyJjb21wYW55IjoiUlAgRGVzaWduIFdlYiBTZXJ2aWNlcyIsImFkZHJlc3MiOiJQLk8uIEJveCAxMTg5IiwiY2l0eSI6IkNoZXNoaXJlIiwic3RhdGUiOiJDVCIsInppcCI6IjA2NDEwIiwiZW1haWwiOiJyb2JlcnRAcnBkZXNpZ24uY29tIiwidG9zIjoiUEhBK1BITjBjbTl1Wno0OFpXMCtWMmhsYmlCNWIzVWdjMmxuYmkxcGJpQjNhWFJvSUhWekxDQjViM1VnWVhKbElHZHBkbWx1WnladVluTndPeUI1YjNWeUlIQmxjbTFwYzNOcGIyNGdZVzVrSUdOdmJuTmxiblFnZEc4Z2MyVnVaQ0I1YjNVZ1pXMWhhV3dnWVc1a0wyOXlJRk5OVXlCMFpYaDBJRzFsYzNOaFoyVnpMaUJDZVNCamFHVmphMmx1WnlCMGFHVWdWR1Z5YlhNZ1lXNWtJRU52Ym1ScGRHbHZibk1nWW05NElHRnVaQ0JpZVNCemFXZHVhVzVuSUdsdUlIbHZkU0JoZFhSdmJXRjBhV05oYkd4NUlHTnZibVpwY20wZ2RHaGhkQ0I1YjNVZ1lXTmpaWEIwSUdGc2JDQjBaWEp0Y3lCcGJpQjBhR2x6SUdGbmNtVmxiV1Z1ZEM0OEwyVnRQand2YzNSeWIyNW5Qand2Y0Q0S0NqeHdQanhoSUdoeVpXWTlJbWgwZEhBNkx5OTNkM2N1WjI5dloyeGxMbU52YlNJK2FIUjBjRG92TDNkM2R5NW5iMjluYkdVdVkyOXRQQzloUGp3dmNENEtDanh3UGladVluTndPend2Y0Q0S0NqeHdQanh6ZEhKdmJtYytVMFZTVmtsRFJUd3ZjM1J5YjI1blBqd3ZjRDRLQ2p4d1BsZGxJSEJ5YjNacFpHVWdZU0J6WlhKMmFXTmxJSFJvWVhRZ1kzVnljbVZ1ZEd4NUlHRnNiRzkzY3lCNWIzVWdkRzhnY21WalpXbDJaU0J5WlhGMVpYTjBjeUJtYjNJZ1ptVmxaR0poWTJzc0lHTnZiWEJoYm5rZ2FXNW1iM0p0WVhScGIyNHNJSEJ5YjIxdmRHbHZibUZzSUdsdVptOXliV0YwYVc5dUxDQmpiMjF3WVc1NUlHRnNaWEowY3l3Z1kyOTFjRzl1Y3l3Z1pHbHpZMjkxYm5SeklHRnVaQ0J2ZEdobGNpQnViM1JwWm1sallYUnBiMjV6SUhSdklIbHZkWElnWlcxaGFXd2dZV1JrY21WemN5QmhibVF2YjNJZ1kyVnNiSFZzWVhJZ2NHaHZibVVnYjNJZ1pHVjJhV05sTGlCWmIzVWdkVzVrWlhKemRHRnVaQ0JoYm1RZ1lXZHlaV1VnZEdoaGRDQjBhR1VnVTJWeWRtbGpaU0JwY3lCd2NtOTJhV1JsWkNBbWNYVnZkRHRCVXkxSlV5WnhkVzkwT3lCaGJtUWdkR2hoZENCM1pTQmhjM04xYldVZ2JtOGdjbVZ6Y0c5dWMybGlhV3hwZEhrZ1ptOXlJSFJvWlNCMGFXMWxiR2x1WlhOekxDQmtaV3hsZEdsdmJpd2diV2x6TFdSbGJHbDJaWEo1SUc5eUlHWmhhV3gxY21VZ2RHOGdjM1J2Y21VZ1lXNTVJSFZ6WlhJZ1kyOXRiWFZ1YVdOaGRHbHZibk1nYjNJZ2NHVnljMjl1WVd4cGVtRjBhVzl1SUhObGRIUnBibWR6TGp3dmNENEtDanh3UGxsdmRTQmhjbVVnY21WemNHOXVjMmxpYkdVZ1ptOXlJRzlpZEdGcGJtbHVaeUJoWTJObGMzTWdkRzhnZEdobElGTmxjblpwWTJVZ1lXNWtJSFJvWVhRZ1lXTmpaWE56SUcxaGVTQnBiblp2YkhabElIUm9hWEprSUhCaGNuUjVJR1psWlhNZ0tITjFZMmdnWVhNZ1UwMVRJSFJsZUhRZ2JXVnpjMkZuWlhNc0lFbHVkR1Z5Ym1WMElITmxjblpwWTJVZ2NISnZkbWxrWlhJZ2IzSWdZMlZzYkhWc1lYSWdZV2x5ZEdsdFpTQmphR0Z5WjJWektTNGdXVzkxSUdGeVpTQnlaWE53YjI1emFXSnNaU0JtYjNJZ2RHaHZjMlVnWm1WbGN5d2dhVzVqYkhWa2FXNW5JSFJvYjNObElHWmxaWE1nWVhOemIyTnBZWFJsWkNCM2FYUm9JSFJvWlNCa2FYTndiR0Y1SUc5eUlHUmxiR2wyWlhKNUlHOW1JR1ZoWTJnZ1UwMVRJSFJsZUhRZ2JXVnpjMkZuWlNCelpXNTBJSFJ2SUhsdmRTQmllU0IxY3k0Z1NXNGdZV1JrYVhScGIyNHNJSGx2ZFNCdGRYTjBJSEJ5YjNacFpHVWdZVzVrSUdGeVpTQnlaWE53YjI1emFXSnNaU0JtYjNJZ1lXeHNJR1Z4ZFdsd2JXVnVkQ0J1WldObGMzTmhjbmtnZEc4Z1lXTmpaWE56SUhSb1pTQlRaWEoyYVdObElHRnVaQ0J5WldObGFYWmxJSFJvWlNCVFRWTWdkR1Y0ZENCdFpYTnpZV2RsY3k0Z1YyVWdaRzhnYm05MElHTm9ZWEpuWlNCaGJua2dabVZsY3lCbWIzSWdaR1ZzYVhabGNua2diMllnWlcxaGFXd2diM0lnVTAxVExpQlVhR2x6SUdseklHRWdabkpsWlNCelpYSjJhV05sSUhCeWIzWnBaR1ZrSUdKNUlIVnpMaUJJYjNkbGRtVnlMQ0J3YkdWaGMyVWdZMmhsWTJzZ2QybDBhQ0I1YjNWeUlHbHVkR1Z5Ym1WMElITmxjblpwWTJVZ2NISnZkbWxrWlhJZ1lXNWtJR05sYkd4MWJHRnlJR05oY25KcFpYSWdabTl5SUdGdWVTQmphR0Z5WjJWeklIUm9ZWFFnYldGNUlHbHVZM1Z5SUdGeklHRWdjbVZ6ZFd4MElHWnliMjBnY21WalpXbDJhVzVuSUdWdFlXbHNJR0Z1WkNCVFRWTWdkR1Y0ZENCdFpYTnpZV2RsY3lCMGFHRjBJSGRsSUdSbGJHbDJaWElnZFhCdmJpQjViM1Z5SUc5d2RDMXBiaUJoYm1RZ2NtVm5hWE4wY21GMGFXOXVJSGRwZEdnZ2IzVnlJR1Z0WVdsc0lHRnVaQ0JUVFZNZ2MyVnlkbWxqWlhNdUlGbHZkU0JqWVc0Z1kyRnVZMlZzSUdGMElHRnVlU0IwYVcxbExpQktkWE4wSUhSbGVIUWdKbkYxYjNRN1UxUlBVQ1p4ZFc5ME95QjBieUE4YUdsbmFHeHBaMmgwSUdOc1lYTnpQU0pqYjIxd1lXNTVVR2h2Ym1WVmNHUmhkR1VpUGlzeE1qQXpNamN4TnprNU1Ud3ZhR2xuYUd4cFoyaDBQaTRnUVdaMFpYSWdlVzkxSUhObGJtUWdkR2hsSUZOTlV5QnRaWE56WVdkbElDWnhkVzkwTzFOVVQxQW1jWFZ2ZERzZ2RHOGdkWE1zSUhkbElIZHBiR3dnYzJWdVpDQjViM1VnWVc0Z1UwMVRJRzFsYzNOaFoyVWdkRzhnWTI5dVptbHliU0IwYUdGMElIbHZkU0JvWVhabElHSmxaVzRnZFc1emRXSnpZM0pwWW1Wa0xpQkJablJsY2lCMGFHbHpMQ0I1YjNVZ2QybHNiQ0J1YnlCc2IyNW5aWElnY21WalpXbDJaU0JUVFZNZ2JXVnpjMkZuWlhNZ1puSnZiU0IxY3k0OEwzQStDZ284Y0Q0OGMzUnliMjVuUGxsUFZWSWdVa1ZIU1ZOVVVrRlVTVTlPSUU5Q1RFbEhRVlJKVDA1VFBDOXpkSEp2Ym1jK1BDOXdQZ29LUEhBK1NXNGdZMjl1YzJsa1pYSmhkR2x2YmlCdlppQjViM1Z5SUhWelpTQnZaaUIwYUdVZ1UyVnlkbWxqWlN3Z2VXOTFJR0ZuY21WbElIUnZPand2Y0Q0S0NqeHZiRDRLQ1R4c2FUNXdjbTkyYVdSbElIUnlkV1VzSUdGalkzVnlZWFJsTENCamRYSnlaVzUwSUdGdVpDQmpiMjF3YkdWMFpTQnBibVp2Y20xaGRHbHZiaUJoWW05MWRDQjViM1Z5YzJWc1ppQmhjeUJ3Y205dGNIUmxaQ0JpZVNCMGFHVWdVMlZ5ZG1salpTWWpNems3Y3lCeVpXZHBjM1J5WVhScGIyNGdabTl5YlNBb2MzVmphQ0JwYm1admNtMWhkR2x2YmlCaVpXbHVaeUIwYUdVZ0puRjFiM1E3VW1WbmFYTjBjbUYwYVc5dUlFUmhkR0VtY1hWdmREc3BJR0Z1WkR3dmJHaytDZ2s4YkdrK2JXRnBiblJoYVc0Z1lXNWtJSEJ5YjIxd2RHeDVJSFZ3WkdGMFpTQjBhR1VnVW1WbmFYTjBjbUYwYVc5dUlFUmhkR0VnZEc4Z2EyVmxjQ0JwZENCMGNuVmxMQ0JoWTJOMWNtRjBaU3dnWTNWeWNtVnVkQ0JoYm1RZ1kyOXRjR3hsZEdVdUlFbG1JSGx2ZFNCd2NtOTJhV1JsSUdGdWVTQnBibVp2Y20xaGRHbHZiaUIwYUdGMElHbHpJSFZ1ZEhKMVpTd2dhVzVoWTJOMWNtRjBaU3dnYm05MElHTjFjbkpsYm5RZ2IzSWdhVzVqYjIxd2JHVjBaU3dnYjNJZ2QyVWdhR0YyWlNCeVpXRnpiMjVoWW14bElHZHliM1Z1WkhNZ2RHOGdjM1Z6Y0dWamRDQjBhR0YwSUhOMVkyZ2dhVzVtYjNKdFlYUnBiMjRnYVhNZ2RXNTBjblZsTENCcGJtRmpZM1Z5WVhSbExDQnViM1FnWTNWeWNtVnVkQ0J2Y2lCcGJtTnZiWEJzWlhSbExDQjNaU0JvWVhabElIUm9aU0J5YVdkb2RDQjBieUJ6ZFhOd1pXNWtJRzl5SUR4emRISnZibWMrUEhOd1lXNGdjM1I1YkdVOUltTnZiRzl5T2lOR1JqQXdNREE3SWo1MFpYSnRhVzVoZEdVZ2VXOTFjaUJoWTJOdmRXNTBMM0J5YjJacGJHVWdZVzVrSUhKbFpuVnpaU0JoYm5rZ1lXNWtJR0ZzYkNCamRYSnlaVzUwSUc5eUlHWjFkSFZ5WlNCMWMyVWdiMllnZEdobElGTmxjblpwWTJVZ0tHOXlJR0Z1ZVNCd2IzSjBhVzl1SUhSb1pYSmxiMllwTGp3dmMzQmhiajQ4TDNOMGNtOXVaejQ4TDJ4cFBnbzhMMjlzUGdvS1BIQStKbTVpYzNBN1BDOXdQZ284YUdsbmFHeHBaMmgwSUdOc1lYTnpQU0pqYjIxd1lXNTVUbUZ0WlZWd1pHRjBaU0krVWxBZ1JHVnphV2R1SUZkbFlpQlRaWEoyYVdObGN6d3ZhR2xuYUd4cFoyaDBQanhpY2lBdlBnbzhhR2xuYUd4cFoyaDBJR05zWVhOelBTSmpiMjF3WVc1NVFXUmtjbVZ6YzFWd1pHRjBaU0krVUM1UExpQkNiM2dnTVRFNE9Td2dRMmhsYzJocGNtVXNJRU5VSURBMk5ERXdQQzlvYVdkb2JHbG5hSFErUEdKeUlDOCtDanhvYVdkb2JHbG5hSFFnWTJ4aGMzTTlJbU52YlhCaGJubFFhRzl1WlZWd1pHRjBaU0krS3pFeU1ETXlOekUzT1RreFBDOW9hV2RvYkdsbmFIUStQR0p5SUM4K0NqeG9hV2RvYkdsbmFIUWdZMnhoYzNNOUltTnZiWEJoYm5sRmJXRnBiRlZ3WkdGMFpTSStjbTlpWlhKMFFISndaR1Z6YVdkdUxtTnZiVHd2YUdsbmFHeHBaMmgwUGc9PSIsInByaXZhY3kiOiJQSEErUEhOMGNtOXVaejVRVWtsV1FVTlpQQzl6ZEhKdmJtYytQQzl3UGdvS1BIQStQSE4wY205dVp6NVVhR1VnYVc1bWIzSnRZWFJwYjI0Z2NISnZkbWxrWldRZ1pIVnlhVzVuSUhSb2FYTWdjbVZuYVhOMGNtRjBhVzl1SUdseklHdGxjSFFnY0hKcGRtRjBaU0JoYm1RZ1kyOXVabWxrWlc1MGFXRnNMQ0JoYm1RZ2QybHNiQ0J1WlhabGNpQmlaU0JrYVhOMGNtbGlkWFJsWkN3Z1kyOXdhV1ZrTENCemIyeGtMQ0IwY21Ga1pXUWdiM0lnY0c5emRHVmtJR2x1SUdGdWVTQjNZWGtzSUhOb1lYQmxJRzl5SUdadmNtMHVJRlJvYVhNZ2FYTWdiM1Z5SUdkMVlYSmhiblJsWlM0OEwzTjBjbTl1Wno0OEwzQStDZ284Y0Q0OGMzUnliMjVuUGtsT1JFVk5Ua2xVV1R3dmMzUnliMjVuUGp3dmNENEtDanh3UGp4bGJUNVpiM1VnWVdkeVpXVWdkRzhnYVc1a1pXMXVhV1o1SUdGdVpDQm9iMnhrSUhWekxDNGdZVzVrSUdsMGN5QnpkV0p6YVdScFlYSnBaWE1zSUdGbVptbHNhV0YwWlhNc0lHOW1abWxqWlhKekxDQmhaMlZ1ZEhNc0lHTnZMV0p5WVc1a1pYSnpJRzl5SUc5MGFHVnlJSEJoY25SdVpYSnpMQ0JoYm1RZ1pXMXdiRzk1WldWekxDQm9ZWEp0YkdWemN5Qm1jbTl0SUdGdWVTQmpiR0ZwYlNCdmNpQmtaVzFoYm1Rc0lHbHVZMngxWkdsdVp5QnlaV0Z6YjI1aFlteGxJR0YwZEc5eWJtVjVjeVlqTXprN0lHWmxaWE1zSUcxaFpHVWdZbmtnWVc1NUlIUm9hWEprSUhCaGNuUjVJR1IxWlNCMGJ5QnZjaUJoY21semFXNW5JRzkxZENCdlppQkRiMjUwWlc1MElIbHZkU0J5WldObGFYWmxMQ0J6ZFdKdGFYUXNJSEpsY0d4NUxDQndiM04wTENCMGNtRnVjMjFwZENCdmNpQnRZV3RsSUdGMllXbHNZV0pzWlNCMGFISnZkV2RvSUhSb1pTQlRaWEoyYVdObExDQjViM1Z5SUhWelpTQnZaaUIwYUdVZ1UyVnlkbWxqWlN3Z2VXOTFjaUJqYjI1dVpXTjBhVzl1SUhSdklIUm9aU0JUWlhKMmFXTmxMQ0I1YjNWeUlIWnBiMnhoZEdsdmJpQnZaaUIwYUdVZ1ZFOVRMQ0J2Y2lCNWIzVnlJSFpwYjJ4aGRHbHZiaUJ2WmlCaGJua2djbWxuYUhSeklHOW1JR0Z1YjNSb1pYSXVQQzlsYlQ0OEwzQStDZ284Y0Q0OGMzUnliMjVuUGtSSlUwTk1RVWxOUlZJZ1QwWWdWMEZTVWtGT1ZFbEZVend2YzNSeWIyNW5Qand2Y0Q0S0NqeHdQanh6ZEhKdmJtYytXVTlWSUVWWVVGSkZVMU5NV1NCVlRrUkZVbE5VUVU1RUlFRk9SQ0JCUjFKRlJTQlVTRUZVT2p3dmMzUnliMjVuUGp3dmNENEtDanh2YkQ0S0NUeHNhVDVaVDFWU0lGVlRSU0JQUmlCVVNFVWdVMFZTVmtsRFJTQkpVeUJCVkNCWlQxVlNJRk5QVEVVZ1VrbFRTeTRnVkVoRklGTkZVbFpKUTBVZ1NWTWdVRkpQVmtsRVJVUWdUMDRnUVU0Z0puRjFiM1E3UVZNZ1NWTW1jWFZ2ZERzZ1FVNUVJQ1p4ZFc5ME8wRlRJRUZXUVVsTVFVSk1SU1p4ZFc5ME95QkNRVk5KVXk0Z0xDNGdRVTVFSUZWVExDQkpWQ1lqTXprN1V5QkRWVk5VVDAxRlVsTXNJRVZZVUZKRlUxTk1XU0JFU1ZORFRFRkpUVk1nUVV4TUlGZEJVbEpCVGxSSlJWTWdUMFlnUVU1WklFdEpUa1FzSUZkSVJWUklSVklnUlZoUVVrVlRVeUJQVWlCSlRWQk1TVVZFTENCSlRrTk1WVVJKVGtjc0lFSlZWQ0JPVDFRZ1RFbE5TVlJGUkNCVVR5QlVTRVVnU1UxUVRFbEZSQ0JYUVZKU1FVNVVTVVZUSUU5R0lFMUZVa05JUVU1VVFVSkpURWxVV1N3Z1JrbFVUa1ZUVXlCR1QxSWdRU0JRUVZKVVNVTlZURUZTSUZCVlVsQlBVMFVnUVU1RUlFNVBUaTFKVGtaU1NVNUhSVTFGVGxRdVBDOXNhVDRLQ1R4c2FUNU5RVXRGVXlCT1R5QlhRVkpTUVU1VVdTQlVTRUZVSUNocEtTQlVTRVVnVTBWU1ZrbERSU0JYU1V4TUlFMUZSVlFnV1U5VlVpQlNSVkZWU1ZKRlRVVk9WRk1zSUNocGFTa2dWRWhGSUZORlVsWkpRMFVnVjBsTVRDQkNSU0JWVGtsT1ZFVlNVbFZRVkVWRUxDQlVTVTFGVEZrc0lGTkZRMVZTUlN3Z1QxSWdSVkpTVDFJdFJsSkZSU3dnS0dscGFTa2dWRWhGSUZKRlUxVk1WRk1nVkVoQlZDQk5RVmtnUWtVZ1QwSlVRVWxPUlVRZ1JsSlBUU0JVU0VVZ1ZWTkZJRTlHSUZSSVJTQlRSVkpXU1VORklGZEpURXdnUWtVZ1FVTkRWVkpCVkVVZ1QxSWdVa1ZNU1VGQ1RFVXNJRUZPUkNBb2FYWXBJRUZPV1NCRlVsSlBVbE1nU1U0Z1ZFaEZJRk5QUmxSWFFWSkZJRmRKVEV3Z1FrVWdRMDlTVWtWRFZFVkVMand2YkdrK0NnazhiR2srUVU1WklFMUJWRVZTU1VGTUlFUlBWMDVNVDBGRVJVUWdUMUlnVDFSSVJWSlhTVk5GSUU5Q1ZFRkpUa1ZFSUZSSVVrOVZSMGdnVkVoRklGVlRSU0JQUmlCVVNFVWdVMFZTVmtsRFJTQkpVeUJFVDA1RklFRlVJRmxQVlZJZ1QxZE9JRVJKVTBOU1JWUkpUMDRnUVU1RUlGSkpVMHNnUVU1RUlGUklRVlFnV1U5VklGZEpURXdnUWtVZ1UwOU1SVXhaSUZKRlUxQlBUbE5KUWt4RklFWlBVaUJCVGxrZ1JFRk5RVWRGSUZSUElGbFBWVklnUTA5TlVGVlVSVklnVTFsVFZFVk5JRTlTSUV4UFUxTWdUMFlnUkVGVVFTQlVTRUZVSUZKRlUxVk1WRk1nUmxKUFRTQlVTRVVnUkU5WFRreFBRVVFnVDBZZ1FVNVpJRk5WUTBnZ1RVRlVSVkpKUVV3dVBDOXNhVDRLQ1R4c2FUNU9UeUJCUkZaSlEwVWdUMUlnU1U1R1QxSk5RVlJKVDA0c0lGZElSVlJJUlZJZ1QxSkJUQ0JQVWlCWFVrbFVWRVZPTENCUFFsUkJTVTVGUkNCQ1dTQlpUMVVnUmxKUFRTQlBVaUJVU0ZKUFZVZElJRTlTSUVaU1QwMGdWRWhGSUZORlVsWkpRMFVnVTBoQlRFd2dRMUpGUVZSRklFRk9XU0JYUVZKU1FVNVVXU0JPVDFRZ1JWaFFVa1ZUVTB4WklGTlVRVlJGUkNCSlRpQlVTRVVnVkU5VExqd3ZiR2srQ2p3dmIydytDZ284Y0Q0OGMzUnliMjVuUGt4SlRVbFVRVlJKVDA0Z1QwWWdURWxCUWtsTVNWUlpQQzl6ZEhKdmJtYytQQzl3UGdvS1BIQStXVTlWSUVWWVVGSkZVMU5NV1NCVlRrUkZVbE5VUVU1RUlFRk9SQ0JCUjFKRlJTQlVTRUZVSUVGT1JDQlRTRUZNVENCT1QxUWdRa1VnVEVsQlFreEZJRVpQVWlCQlRsa2dSRWxTUlVOVUxDQkpUa1JKVWtWRFZDd2dTVTVEU1VSRlRsUkJUQ3dnVTFCRlEwbEJUQ3dnUTA5T1UwVlJWVVZPVkVsQlRDQlBVaUJGV0VWTlVFeEJVbGtnUkVGTlFVZEZVeXdnU1U1RFRGVkVTVTVISUVKVlZDQk9UMVFnVEVsTlNWUkZSQ0JVVHl3Z1JFRk5RVWRGVXlCR1QxSWdURTlUVXlCUFJpQlFVazlHU1ZSVExDQkhUMDlFVjBsTVRDd2dWVk5GTENCRVFWUkJJRTlTSUU5VVNFVlNJRWxPVkVGT1IwbENURVVnVEU5VFUwVlRJQ2hGVmtWT0lFbEdJRWhCVXlCQ1JVVk9JRUZFVmtsVFJVUWdUMFlnVkVoRklGQlBVMU5KUWtsTVNWUlpJRTlHSUZOVlEwZ2dSRUZOUVVkRlV5a3NJRkpGVTFWTVZFbE9SeUJHVWs5Tk9qd3ZjRDRLQ2p4dmJENEtDVHhzYVQ1VVNFVWdWVk5GSUU5U0lGUklSU0JKVGtGQ1NVeEpWRmtnVkU4Z1ZWTkZJRlJJUlNCVFJWSldTVU5GT3p3dmJHaytDZ2s4YkdrK1ZFaEZJRU5QVTFRZ1QwWWdVRkpQUTFWU1JVMUZUbFFnVDBZZ1UxVkNVMVJKVkZWVVJTQkhUMDlFVXlCQlRrUWdVMFZTVmtsRFJWTWdVa1ZUVlV4VVNVNUhJRVpTVDAwZ1FVNVpJRWRQVDBSVExDQkVRVlJCTENCSlRrWlBVazFCVkVsUFRpQlBVaUJUUlZKV1NVTkZVeUJRVlZKRFNFRlRSVVFnVDFJZ1QwSlVRVWxPUlVRZ1QxSWdUVVZUVTBGSFJWTWdVa1ZEUlVsV1JVUWdUMUlnVkZKQlRsTkJRMVJKVDA1VElFVk9WRVZTUlVRZ1NVNVVUeUJVU0ZKUFZVZElJRTlTSUVaU1QwMGdWRWhGSUZORlVsWkpRMFU3UEM5c2FUNEtDVHhzYVQ1VlRrRlZWRWhQVWtsYVJVUWdRVU5EUlZOVElGUlBJRTlTSUVGTVZFVlNRVlJKVDA0Z1QwWWdXVTlWVWlCVVVrRk9VMDFKVTFOSlQwNVRJRTlTSUVSQlZFRTdQQzlzYVQ0S0NUeHNhVDVUVkVGVVJVMUZUbFJUSUU5U0lFTlBUa1JWUTFRZ1QwWWdRVTVaSUZSSVNWSkVJRkJCVWxSWklFOU9JRlJJUlNCVFJWSldTVU5GT3lCUFVqd3ZiR2srQ2drOGJHaytRVTVaSUU5VVNFVlNJRTFCVkZSRlVpQlNSVXhCVkVsT1J5QlVUeUJVU0VVZ1UwVlNWa2xEUlM0OEwyeHBQZ284TDI5c1Bnb0tQSEErUEhVK1Fua2djbVZuYVhOMFpYSnBibWNnWVc1a0lITjFZbk5qY21saWFXNW5JSFJ2SUc5MWNpQmxiV0ZwYkNCaGJtUWdVMDFUSUhObGNuWnBZMlVzSUdKNUlHOXdkQzFwYml3Z2IyNXNhVzVsSUhKbFoybHpkSEpoZEdsdmJpQnZjaUJpZVNCbWFXeHNhVzVuSUc5MWRDQmhJR05oY21Rc0lDWnhkVzkwTzNsdmRTQmhaM0psWlNCMGJ5QjBhR1Z6WlNCVVJWSk5VeUJQUmlCVFJWSldTVU5GSm5GMWIzUTdJR0Z1WkNCNWIzVWdZV05yYm05M2JHVmtaMlVnWVc1a0lIVnVaR1Z5YzNSaGJtUWdkR2hsSUdGaWIzWmxJSFJsY20xeklHOW1JSE5sY25acFkyVWdiM1YwYkdsdVpXUWdZVzVrSUdSbGRHRnBiR1ZrSUdadmNpQjViM1VnZEc5a1lYa3VQQzkxUGp3dmNENEtDanh3UGladVluTndPend2Y0Q0S1BHaHBaMmhzYVdkb2RDQmpiR0Z6Y3owaVkyOXRjR0Z1ZVU1aGJXVlZjR1JoZEdVaVBsSlFJRVJsYzJsbmJpQlhaV0lnVTJWeWRtbGpaWE04TDJocFoyaHNhV2RvZEQ0OFluSWdMejRLUEdocFoyaHNhV2RvZENCamJHRnpjejBpWTI5dGNHRnVlVUZrWkhKbGMzTlZjR1JoZEdVaVBsQXVUeTRnUW05NElERXhPRGtzSUVOb1pYTm9hWEpsTENCRFZDQXdOalF4TUR3dmFHbG5hR3hwWjJoMFBqeGljaUF2UGdvOGFHbG5hR3hwWjJoMElHTnNZWE56UFNKamIyMXdZVzU1VUdodmJtVlZjR1JoZEdVaVBpc3hNakF6TWpjeE56azVNVHd2YUdsbmFHeHBaMmgwUGp4aWNpQXZQZ284YUdsbmFHeHBaMmgwSUdOc1lYTnpQU0pqYjIxd1lXNTVSVzFoYVd4VmNHUmhkR1VpUG5KdlltVnlkRUJ5Y0dSbGMybG5iaTVqYjIwOEwyaHBaMmhzYVdkb2REND0ifQ==

Terms of Service

Privacy Policy

Core Modal Title

Sorry, no results found

You Might Find These Articles Interesting

T
Please Check Your Email
We Will Be Following Up Shortly
*
*
*